Anji Cooper
  • Blog
  • About/Contact
  • Anji Books
  • Recipes
  • Gallery

Welcome to my blog! 

If I'm being entirely honest with you, I don't actually post too often on this blog, but you know if you want to follow me go for it. When I do post though, I often post recipes or random things like life updates or whatever. It's honestly just a hobby blog, anything that I'm currently into might get posted here. I also have another blog where I review things (movies, TV shows, books, mostly books) @ Anjibooks, so if you're looking for a good book or anything, definitely go check that out. 

Recipe: Golden Milk

2/19/2019

0 Comments

 
Picture
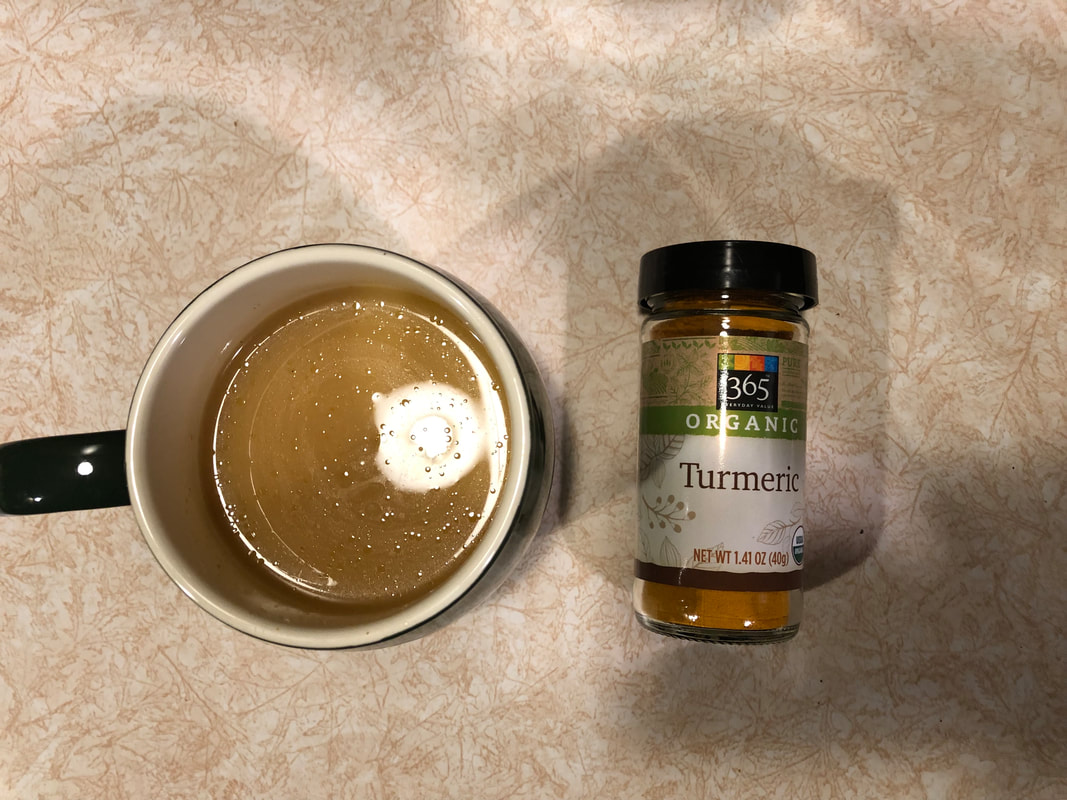
Let's just say I'm very apologetic for not actually writing that blog post I promised, okay? But here's a nice short and sweet one for y'all. Every year, towards the end of the winter term and the beginning of spring term, I go through a health phase where I start cooking and baking healthy recipes, and trying all new things. This golden milk recipe is my new favorites. I make a cup every evening, and it's the perfect thing to help me settle down. (Which 
Golden milk is a trend I'm quite behind on, it seems like everyone and their mother have already tried and become obsessed with it, but if you're like me and apparently living under a rock, here's a quick explanation of what it is. 
Golden milk is a milk infused with a blend of superfood spices such as turmeric, cinnamon and ginger. That means it has quite a number of health benefits, which include but are not limited to having anti-inflammatory  and joint relieving properties, being filled with antioxidants, perhaps aiding in memory and brain function and mood, protecting against heart disease, and lowering blood sugar levels and risk of cancer. If you're interested as to why that is, I may make another post, or it's pretty easy to look up, but I promised a quick post and explanation, and I'm going to try and stick by that promise. 
Just a a few more quick side notes about the recipe.  if you're wondering about the pepper, it helps to bring out the health benefits locked inside the turmeric so your body can actually absorb them. 
You can use any sort of milk in the recipe, even cow's, and heat that milk any way you wish. I use a milk frother, but I am aware not everyone has those so use whatever you prefer: microwave, stove, etc.
You can sprinkle cardamom and clove on top of the milk to add more flavor and health benefits, but I personally am not a fan of those flavors and do not use them. 
There are a ton of recipes, all differing from each other, on golden milk, but this one has been my favorite of them all because it makes a paste that you can make once and use for a long time-- that means not having to heat milk up on the stove every night = making my life and level of dishes so much easier. 
The most difficult part of the recipe is making the paste, which simply involves sitting by the stove for 5-10 minutes, whisking some spices and water so not really all that difficult. Without further adieu, here's the recipe. 

Paste: 
Ingredients: 
1/2 cup water
2 tsp turmeric (ground spice) 
1 T + 2 tsp coconut oil 
1/4 tsp freshly ground black pepper 
1/4 tsp ginger root
1/4 tsp ground cinnamon 

Recipe: 
1) Place all ingredients into saucepan. 
2) Put on medium heat and whisk until a thickened paste. 
3) Place in a container and keep in the fridge. (Will keep for a long time as none of the ingredients are particularly perishable). 

Milk: 
Ingredients: 
1 tsp paste
1 cup milk (coconut, almond, soy, hemp, etc.) 
Maple syrup or honey to taste
1/4 tsp cardamom (optional) 
1/4 tsp cloves (optional) 

Recipe; 
1) Heat milk. 
2) Stir all ingredients in a mug until well mixed. 
2b) Throw ingredients into a blender to make a frothy latte. 
3) (The hardest step of all) Enjoy! 

Thanks for reading, hope you all love this recipe as much as I do. <3 
​Anji
0 Comments

Testing Buzzfeed's "Perfect" Chocolate Chip Cookie Recipe

8/4/2018

0 Comments

 
Picture
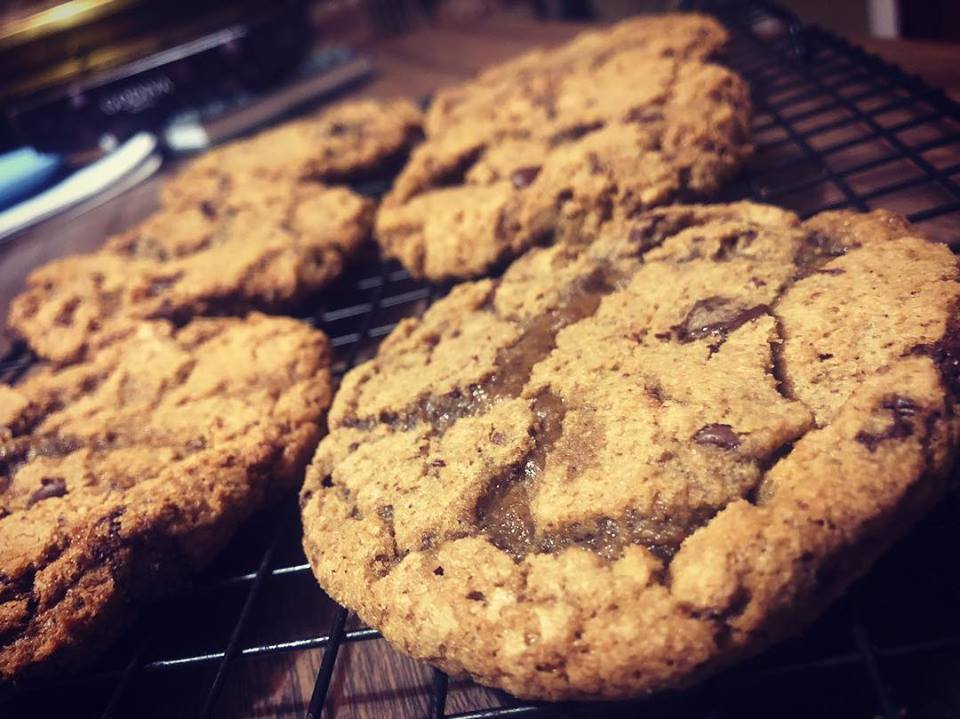
Chocolate chip cookies were a staple in most of our childhoods. I, for one, have many memories of helping to measure flour and sugar, and then being told NOT to eat the cookie dough (and then eating it anyway). Then again, as a child I was more than happy to be given anything sweet. Now a days I'm not the biggest consumer of cookies-- I find them boring to make and boring to eat. Nevertheless, when I came across Buzzfeed's "Perfect" Chocolate Chip Cookie recipe, I felt a relentless urge to try it out. Why? I'm not exactly sure, especially since Buzzfeed's "Perfect" Chocolate Cake recipe turned out to be such an epic failure. Still, I tried it, and here are my results. (In the video) 
The conclusion that I came to was that yes, these are in fact some spectacular cookies. They have a crunchy outside and a goey middle-- which, for most, is what would be defined as the "perfect" cookie. Would I say they're the best in the entire world? See, the difficult thing is that first off, they're not exactly my preferred type of cookie, and secondly I don't eat a lot of cookies therefore I can't exactly be the best judge of what the "best" is. My favorite kind of cookie is the really crunchy sort-- and while goey is good, I think crunchy is better. The recipe is certainly better than your average cookie, due to the extra ingredients in it such as browned butter and espresso powder-- they just add more layers of flavor that really make it a treat for your tongue. 
The recipe is definitely a lot more work than your average cookie recipe as well-- such as the browned butter. While the browned butter makes the flavor go beyond average, it also takes an age to make. And all the extra steps do add up to a lot of extra time (which can be assumed, I suppose, because adding anything extra would obviously add extra time). I would recommend trying making these if you're looking for something fancy-- maybe to impress people, or maybe just to try a really good cookie. If you just want a quick and easy cookie, this certainly isn't the recipe for you. 
I followed every step given, including the recommended but unnecessary step of leaving the cookies to sit in the fridge overnight. This is a way to develop more flavor in the dough-- actually, it's a trick that many bakeries use, and since I wanted these cookies to be the best they could, I left them to sit overnight. Which turned out to be harder than I expected-- the extra ingredients made this cookie dough even more deadly and tempting than other doughs. All I wanted to do was just gobble down the raw dough, needless to say I was pretty excited to try them after they were baked off the next morning. 
I also added half a teaspoon less salt than the recipe called for after reading a comment on the original video saying the normal amount was WAY too salty. Personally, I think this was a good choice because the cookies I tried seemed to have just the right balance of salt in them, but according to Caitlin, I should've added the extra salt and that would've made them just perfect for her. So, if you're a fan of salty cookies, go for the full two teaspoons. 

Also here's the link to Buzzfeed's video and recipe-- but just so you don't have to click on another link, here is the full recipe written out below as well. :)


Makes 18 cookies
INGREDIENTS
1 cup bread flour
¾ cup all-purpose flour
2 teaspoons kosher salt or 1½ teaspoon table salt
1 teaspoon baking soda
1 cup (2 sticks) unsalted butter
2-3 tablespoons cold water
1 cup dark brown sugar
½ cup white sugar
2 teaspoons vanilla extract
1 teaspoon espresso powder
1 large egg
1 large egg yolk
½ cup semisweet chocolate chips
5 ounces dark chocolate, chopped
PREPARATION
Preheat the oven to 350˚F (180˚C). (Unless you want to let the cookies sit overnight in the fridge)
In a medium bowl, sift together the flours, salt, and baking soda. Set aside. 
In a medium light-bottomed saucepan, add the butter and melt over medium heat. 
Bring the butter to a boil, stirring occasionally. As the water begins to boil out of the butter, the milk solids in the butter will separate, sink to the bottom, and begin to toast and brown. As this begins to happen, make sure to stir constantly so the butter browns evenly. It may become quite foamy and difficult to see, so keep a close eye on it.
Once the butter has turned a nice nutty brown, remove from the heat and pour into a liquid measuring cup to stop the cooking. Give it a stir and add 2-3 tablespoons of cold water to the butter to bring it back up to 1 cup of liquid. Set aside to cool to room temperature. To help speed this process up, you can place in the fridge for 10-15 minutes. You want to make sure the butter is still liquid when you’re adding it to the dough later on, so make sure to remove after 15 minutes.
In a large bowl, add the sugars, vanilla, espresso powder, and cooled brown butter. Cream together with an electric hand mixer until light and fluffy, 1-2 minutes. (If not becoming fluffy, the butter may be too warm. Stick in the fridge for a bit to let it cool off and then try again.) 
Add the egg and yolk and beat until incorporated.
Add the dry ingredients, about ⅓ of the mixture at a time, and beat between additions until just incorporated. It’s okay for there to be a bit of unmixed flour on the edge of bowl, this will be incorporated in the next step. 
Using a wooden spoon, fold the chocolate chips and chunks into the dough
Scoop the cookies onto a parchment paper-lined baking sheet in 3-tablespoon-sized mounds. 
For optimal flavor, cover and refrigerate for 1 hour or, even better, overnight. 
Evenly space the dough 3 inches apart from one another on a parchment paper-lined baking sheet. Bake in a preheated oven for 12-14 minutes. 
Let the cookies cool on the baking sheet for 2-3 minutes before transferring to a cooling rack to cool completely.
Enjoy!

Thanks for reading, 
​Anj


0 Comments

Recipe: Blush Sauce

2/27/2018

0 Comments

 
Picture
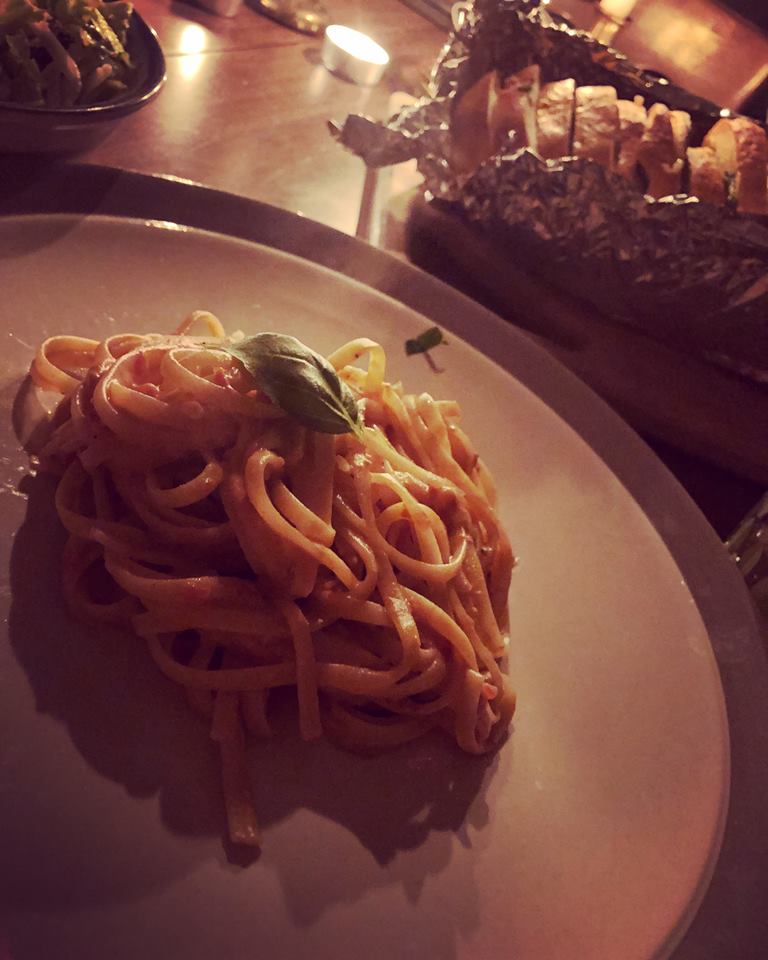
Want a decadent sauce to create a perfect meal? This homemade blush sauce is sure to a. complete a dish and b. make its excellence sky rocket out of proportions. Both easy to make and delicious to eat. This is most definitely a recipe you want to try if you adore pasta like me. Anyway, here's the recipe: 

Ingredients: 
12 oz. linguine pasta 
2 T. extra-virgin olive oil 
1 large shallot, minced (1/3-1/2 cup) 
1 garlic clove, minced
pinch of red pepper flakes 
14.5 oz can diced tomatoes, undrained & pulsed into a food processor until mostly smooth (about 5 1 second pulses) 
1 1/2 c. half & half 
1/2 tsp. salt 
1/2 tsp sugar 
1/2-3/4 cup Gorgonzola cheese (I recommend 3/4, it really enhances the flavor, even if you don't like the taste of Gorgonzola, it blends perfectly and enhances, doesn't take over the sauce) 
1/2 cup chopped fresh basil
freshly ground black pepper to taste 

Instruction: 

1. In a large skillet, heat olive oil over medium heat until oil simmers. Add shallot and sauté, stirring often until shallot is softened, but not browned, around 3-4 minutes. Add garlic and red pepper flakes and sauté until very fragrant, about a minute. Add tomatoes, half & half, salt and sugar. Bring to a simmer, reduce heat to medium-low and simmer, stirring occasionally until thickened slightly & mostly smoothed out, about 15 minutes. Add Gorgonzola and stir until the cheese melts and is homogenous with the sauce. 

2. While sauce simmers, bring a large pot of water to a boil. Add around 1 Tablespoon of salt to the water and add pasta. Cook according to package directions to al dente. Drain and reserve 1 cup past water in case the sauce turns out too thick. 

3. Add linguine to sauce along with the chopped basil. Stir to well-coat pasta the with sauce, adding the reserved pasta cooking water a little at a time if the sauce is too thick. Season with freshly ground black pepper. 


Enjoy! 
​Anji
0 Comments

The Best Frosted Soft Sugar Cookies

1/29/2018

0 Comments

 
Picture
You know those addicting soft sugar cookies sold at the grocery store? The ones with the swath of colored icing and sprinkles on top? Yeah, well this recipe is just like them, except so much better. Why are they better? Well, they're freshly baked for one. Freshly baked things always taste better. And they have no preservatives and are made with fresh ingredients. They may take longer than just going to Giant and buying box of those delicious cookies, but it's worth it because of how good these  cookies taste. Plus-- they look just like the store bought ones, which is a fun extra tidbit. 
This recipe is great for several reasons-- of course, it tastes good, but it also makes a ton of cookies. So your hard work will pay off because you'll have a gargantuan amount of cookies to feast on when they're done! 

Ingredients: 

Cookies: 

1 cup butter, room temperature 
1 3/4 cup sugar
2 eggs, room temperature
1 tsp vanilla 
1 cup sour cream 
1/4 tsp almond extract
5 1/2 cups flour
1 tsp baking powder
1 1/2 tsp baking sode
1/2 tsp salt

Frosting: 

3/4 cup butter 
3 1/2 cups powdered sugar 
3-4 T heavy cream 
1 tsp vanilla 
food coloring and sprinkles

Directions:
Cookies:
1.In a large bowl mix together margarine and sugar. Beat until creamy. Add in eggs, vanilla, lemon extract and sour cream and mix together until combined.
2. In a separate bowl mix together flour, baking soda, baking powder and salt. Slowly add dry ingredients to the wet ingredients. Mix just until combined.
3. Split dough in two and place in saran wrap. Refrigerate dough for 1-2 hours.
4. Once dough has been chilled roll out dough on a bakers mat or parchment paper. Add another 1/4 – 1/2 cup flour if dough is still sticky. Cut with floured cookie cutter.
5. Bake at 350 degrees for 8-9 minutes until beginning to lightly turn golden on the sides. 
Frosting:
1. Combine all listed ingredients, mix with an electric mixer until smooth. Simply frost cookies by using a knife and sprinkle on some sprinkles. :) 

Hope you all enjoy this recipe as much as I did! Thanks for reading, 
​Anj


0 Comments

Recipe: Ramen Made Better

8/6/2017

0 Comments

 
Picture
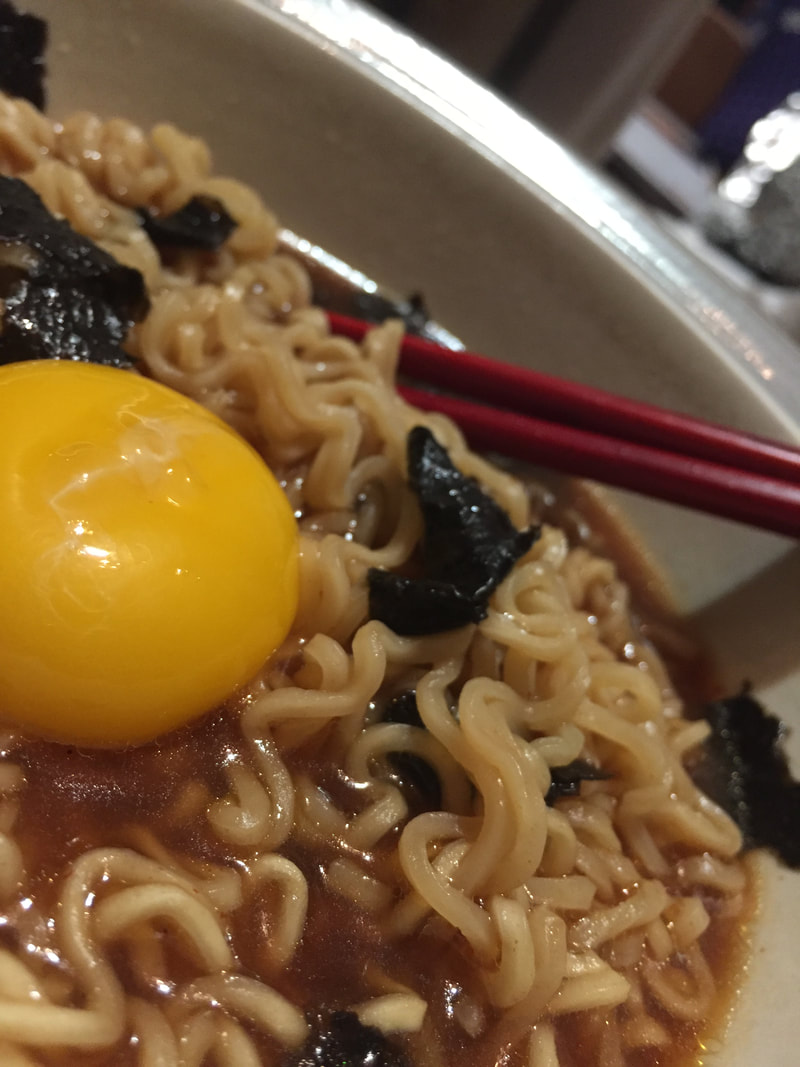
Ramen, it's quick, easy and delicious. But you know how you could make it better? With this recipe-- and it only adds about a minute on to ramen's regular cook time! Here's my master ramen recipe, and don't worry, there's no raw egg in it. The egg cooks in the ramen's hot broth. (The egg makes the broth richer and just so ​much better)

TIP: you can freeze the leftover egg white to use later!

Recipe:

1 packet of ramen noodles
1 1/2 cups water
1 T soy sauce
1-1 1/2 tsp sriracha
1 sheet of nori
1 egg yolk

1. Bring the 1/2 cup water to a boil, add in ramen noodles and broth packet (this will put more flavor into the noodles if they cook in the broth) Cook 3 minutes.
2. Break the Nori up into bits and put it in the serving bowl
3. Add ramen to the bowl, mix in sriracha and soy sauce
4. Add yolk to the top (take any pictures now)
5. Break yolk and mix into hot broth to cook it.
6. Enjoy!

Thanks for reading,
​Anj
0 Comments

Recipe: Easy French Onion Soup

7/11/2017

4 Comments

 
Picture
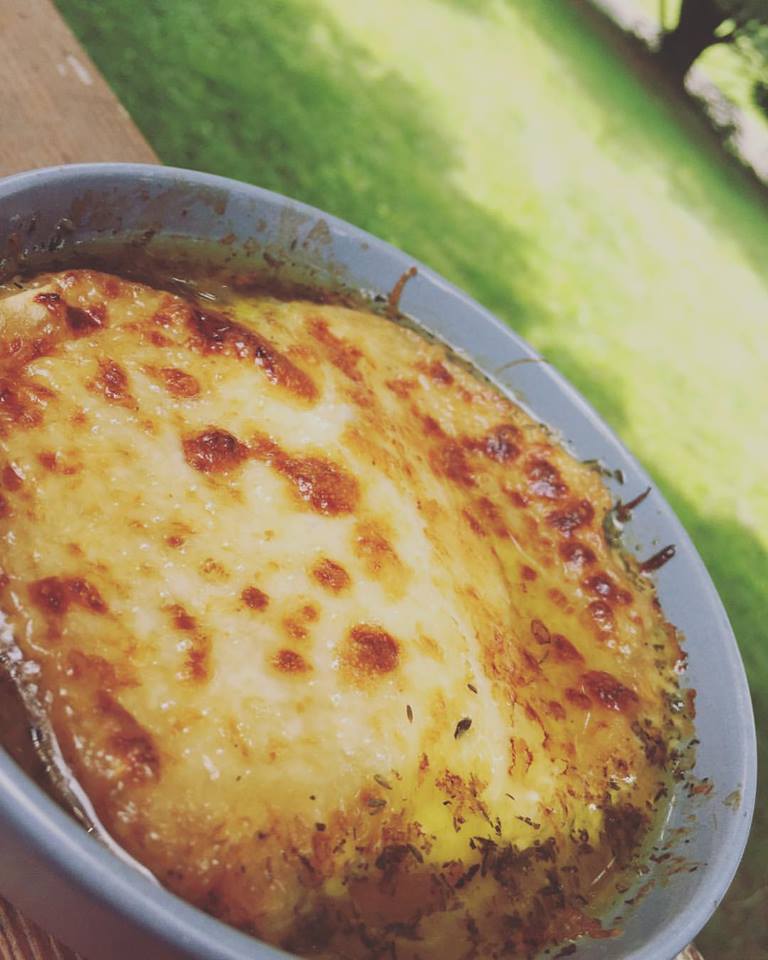
French Onion Soup made easy-- how? Just use a crockpot. I love French Onion Soup, whenever I see it on the menu, I almost always have to get it. Now I don't even have to go out to get this decadent soup, I just have to look in my fridge, haha. I'll be honest here, I've been eating French Onion Soup for lunch everyday. Sadly, today I ate the last bit, but I'll be sure to make some again soon. 
Using the slow cooker also helps to make the soup healthier, at least a tiny bit, by cutting out the sugar needed to caramelize the onions. As to be expected with a slow cooker, this soup will take a while, but the end results are so worth it.  
You top the soup off with dry french bread and cheese. I actually happened to have made my own french bread before making this soup. It was a couple of days old, so basically perfect for topping off this soup. If you all are interested, I could share my recipe for french bread sometime as well. It's really easy and really delicious. :) 

French Onion Soup 
Ingredients: 
3lbs onions, sliced 
1/2 cup unsalted butter
1/2 tsp salt 
64 oz reduced sodium beef broth 
1 T worchestershire sauce
1 clove of garlic, minced 
1/3 cup dry sherry 
4 sprigs fresh thyme (1 tsp dry) 
1 bay leaf 
dry french bread
cheese of your choice (I used mozzarella and parmesan) 

Directions: 
1. Combine onions, butter and salt in the slow cooker. Stir, and cook on low for 8 hours. (You only need half for the recipe, but you can freeze them and save them for another batch of soup or add them to any other recipes.) 
2. Remove half the onions (or leave as many as you want in your soup), and add the rest of the ingredients (minus the cheese and bread) into the slow cooker. 
3. Cook on low for 6-8 hours. 
4. Remove and discard bay leaf. 
5. Ladle soup into oven-safe bowls, top with dry bread slices and cheeses. Broil for 3-5 minutes until cheese is melted and browned. 

I hope you all enjoy this recipe as much as I did! :) Thanks for reading, 
Anj

4 Comments

Recipe: Flavored Popcorn

6/8/2017

0 Comments

 
Popcorn is a great snack. It's got that crunch that cures cravings AND is pretty healthy. Especially if you have an air popper (which I don't). So in this post I'll giver you all a good method to cooking popcorn-- and no, I'm not talking about microwave popcorn, this is cooking kernels on the stovetop. Oh yeah, another pro for popcorn? It's cheap yet it makes a TON. Though, if you're really in a time crunch, and still want to eat a healthy snack, you can buy some ready-to-eat popcorn like the ones made by SkinnyPop.  My sister, Zia loves the ready-to-eat stuff, she's always munching on it. 
I used to love to experiment with popcorn flavors-- making things like sushi flavored popcorn (using soy sauce along with a few other ingredients). It was something I enjoyed to to when I came home from school. But my all-time favorite recipe has to be the honey mustard popcorn, which is the recipe I'll share here along with a siricha popcorn recipe. YUM! The honey mustard popcorn is a little sticky, but the flavor is so worth it. They also have few ingredients that you probably already have-- so jump into the kitchen and get popping! (Sorry, that was really cheesy. I'm just in a good mood because exams just ended).

First, before the true recipe, I'll give you instructions on how to pop popcorn on the stovetop perfectly every time.

1/3 cup popcorn kernels
3 T Coconut Oil

In a sauce pan over medium heat, melt coconut oil and throw in three popcorn kernels-- when these pop you know it's time to pour the rest of the kernels into the pan. Once all the kernels are covering the bottom, take the pan off heat and count to sixty. This will make sure they'll all pop at the same time. After 60 seconds, put the pan back on with the lid slightly cracked. Once the popping slows, remove from heat and add in your seasonings.

Seasonings:
Honey Mustard
3 T Honey
3 T Mustard
1 T Vegtable oil
1 tsp Salt (optional)

1) mix these ingredients together until homogenous.
2) pour over popcorn & toss to coat.

Siracha:
4 T Butter
2 tsp Siracha
1 tsp salt (optional)

1) in a pan melt butter, whisk in Siracha and salt
2) pour over popcorn & toss to coat.

Hope you all enjoy! Thanks for reading,
​Anj


​
0 Comments

Recipe: Healthy Fudge Brownies (Sugar-free, Gluten-free)

5/15/2017

0 Comments

 
Picture
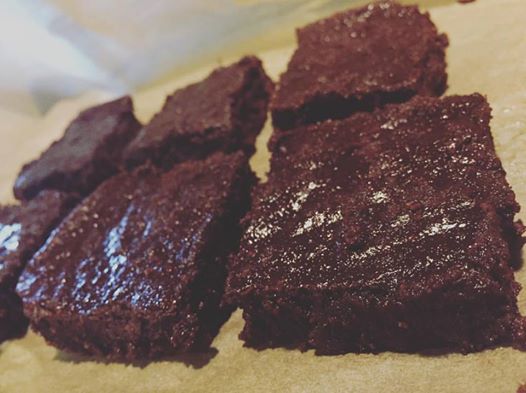
Yup, I'm on another diet. Am I technically cheating by making these? Yep. But the key word there is technically. Technically the only rules I'm breaking are no recreating an unhealthy dish, and using coconut flour. Okay, and I guess using vanilla, but the only reason vanilla is banned from the diet is so no one can get drunk off of it, and I promise there's not enough vanilla in these to get drunk off of, even if there was, it'd be cooked off before these are in an edible state anyway. 
Well, these brownies are absolutely fantastic, you wouldn't even know they were healthy brownies if you just ate them. I promise. They're so good, I highly encourage everyone to try these. They're honestly... I can't even describe it. Last time my staple "goodie" was the healthy twix bar recipe (which I already shared), this time? I've probably been eating too many of these... well, haha let's not think about it. Here's the recipe. 

Ingredients: 
1/2 cup coconut oil
1/2 cocoa powder (or cacao) 
2 oz. unsweetened chocolate 
3/4 cup honey 
2 eggs 
1 tsp vanilla 
1/4 cup coconut flour 
1/2 tsp salt 
1 tsp espresso powder (optional) 

Directions: 
1. Preheat oven to 350 degrees Fahrenheit, and line a 9x9 inch baking pan with parchment paper. Grease the parchment paper. 
2. In a medium saucepan, combine coconut oil, cocoa (or cacao) powder, and unsweetened chocolate, whisking constantly over medium heat. Whisk until mixture is smooth and without any lumps. 
3. Remove from heat and stir in honey, this should thicken the mixture. 
4. Whisk in eggs and vanilla, mixing quickly so the eggs do not scramble. 
5. Add in coconut flour, salt, and espresso powder. Mix until no dry pockets remain. 
6. Pour into the prepared pan, and spread to corners. Bake for 20-25 minutes or until the middle can be poked. 
7. Store in the fridge after the first day to keep fresh. 

Thanks for reading! 
​-Anj
0 Comments

Sweet and Spicy Cauliflower 

4/14/2017

0 Comments

 
Picture
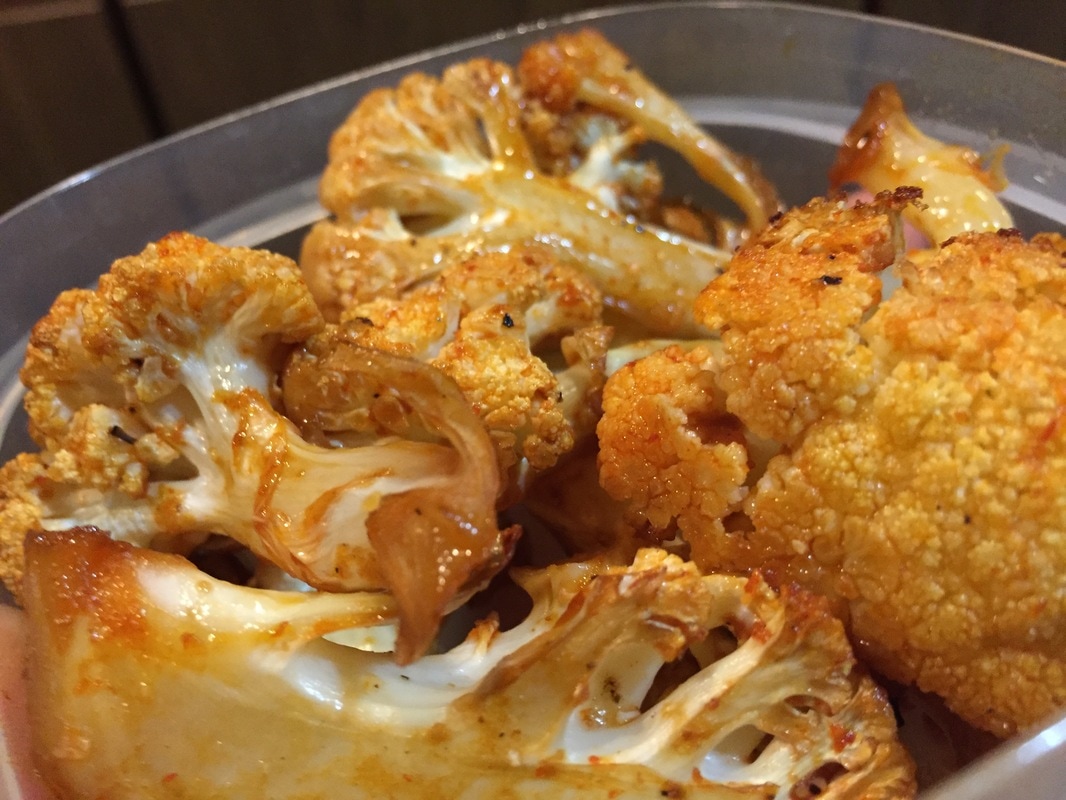
Quite possibly one of the tastiest healthy recipes that is so EASY. Honesty, all you do is just throw all the ingredients into a bag, shake it up. Pour them out onto a tray and cook it. That's it. 
It's a really good recipe for if you've been super busy like me lately. See, that's my excuse as to why I haven't updated my blog. In reality, yes, I am very busy (NaNoWriMo and school), but when I am free I've been procrastinating my free time away. So yeah, sorry, we're probably not going to see too many, if any more updates out of me this month. So here's a wonderful recipe to hold you over.

Sweet and Spicy Cauliflower 

Ingredients: 
 4 cup cauliflower, cut into pieces
2 T maple syrup
2 T sriracha 
2 T olive oil
1/2 tsp soy sauce / tamari 
1/2 tsp black pepper 

Instructions: 
1. Preheat oven to 400, line a baking sheet with foil or parchment paper
2. In a large bag (or bowl) throw all the ingredients and shake until evenly coated
3. Spread out on baking sheet and bake for 30 minutes or until cauliflower is tender (Make sure the sheet isn't over crowded so the vegetable can cook correctly). 

Yay. Done. Thanks for reading, 
​Anj
0 Comments

Recipe: Banana Pancakes

2/6/2017

0 Comments

 
Picture
During the month of January, I participated in a diet called The Whole30. While on this diet, I ate some pretty weird food, but I also discovered some pretty amazing recipes that not only taste delicious, but are also healthy. Some of my favorites are the Twix Bars and Caramel Milkshake. (If you haven't noticed, I really like recreating unhealthy foods because I kinda love those kinds of foods. (technically that's not allowed on the whole30, but whatever, I technically stayed in the guidelines.)) This is also another recipe that I absolutely fell in love with, and definitely intend to be using after the diet (and I have been.) 
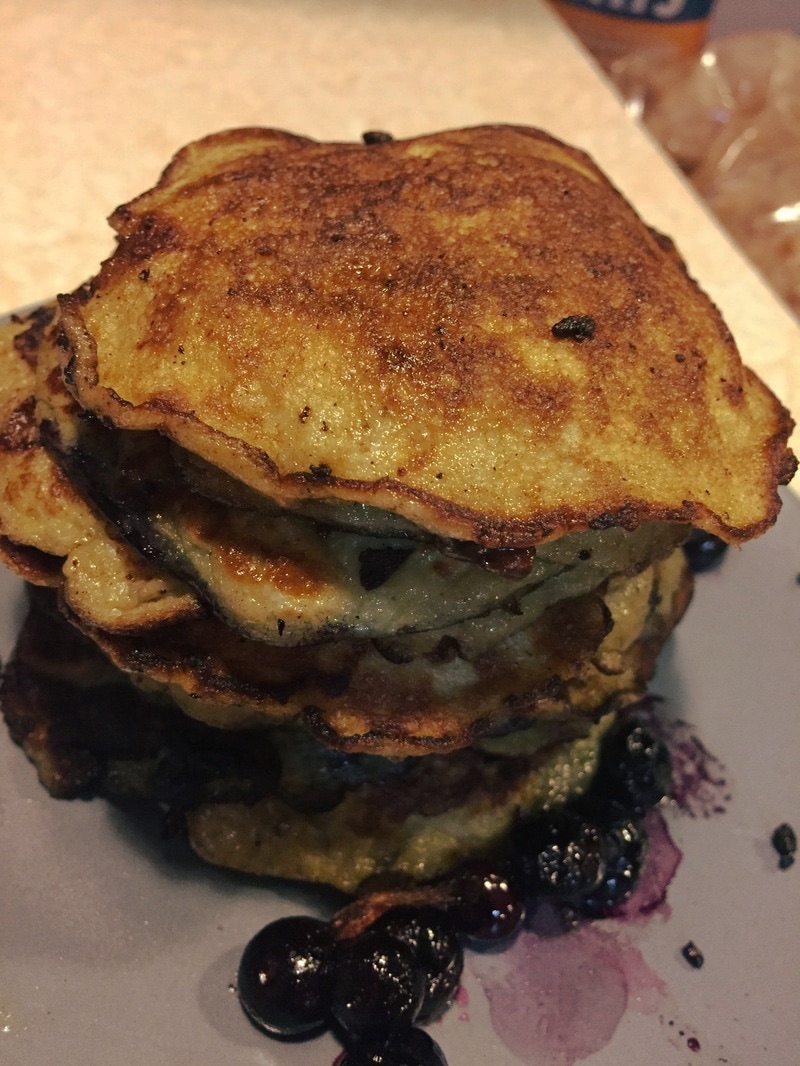
These banana pancakes are gluten-free, sugar-free and nut-free. So most dietary restrictions, but they are certainly not vegan, haha. They taste fantastic, and if you don't think about it too hard, they are actually a bit like pancakes. Plus, for those who don't like bananas much (like me), these will still work 'cause they don't taste like bananas. 
Anyway, here's the recipe. It makes about enough for one (the picture has a double batch in it), and is easily doubled or tripled. Oh, and just warning you, they are a bit hard to flip, since they're thinner, but you just have to wait until they're cooked enough on one side to be stable. (these are delicious with maple syrup!) There are a lot of mix ins, I personally find the baking powder, salt and vanilla extract are perfectly fine. You add the blueberries and chocolate chips in while they're cooking, which are also good mix ins.

Ingredients: 
1 medium ripe banana 
2 eggs 

Oil (coconut or olive) 

1/4 tsp vanilla extract (optional) 
1/8 tsp baking powder (optional) 
1/8 tsp salt (optional) 
1 T cocoa powder (optional) 
1 T honey (optional) 

chocolate chips (optional) 
blueberries/fruit (optional) 


Instructions: 
1) In a bowl, mash the banana with a fork until it has a mushed, pudding-like consistency 
2) In another bowl, whisk together eggs until thoroughly combined
3) Add any extra ingredients for the batter into the bananas (this would include the vanilla, baking powder, salt, cocoa powder and honey) 
4) Mix together eggs and bananas 
5) Heat pan over medium low heat, place oil in the pan 
6) Drop about 2 Tablespoons of batter on the pan and press in any other mix ins
7) Cook for about 1 minute, or until the bottom is golden brown or the top seems stable enough to flip
8) Flip, and cook the other side for about a minute
9) Cook rest of the pancakes  (I like to keep them in the oven on warm to keep them, well, warm until they're all done) 
10) Serve warm with your favorite pancake toppings 

Enjoy! Love y'all,
Anj
0 Comments
<<Previous
    Picture

    Author

    I'm very passionate about reading, writing, baking, cooking, crafting and art. I also enjoy photography, being with friends, procrastinating, and doing pointless things on internet.  

      Subscribe For Updates :)

    Subscribe

    RSS Feed

    Categories

    All
    Accidents/Embarrassing Moments
    Arts/Crafts
    College
    Cooking And Baking
    DIY
    Family
    Friends
    Healthy Food
    High School
    Life Update
    Me
    Quotes
    Recipes
    Special Occasion
    Travel
    YouTube

    twitter

    Archives

    December 2020
    September 2019
    April 2019
    March 2019
    February 2019
    December 2018
    October 2018
    September 2018
    August 2018
    June 2018
    May 2018
    April 2018
    March 2018
    February 2018
    January 2018
    December 2017
    November 2017
    October 2017
    September 2017
    August 2017
    July 2017
    June 2017
    May 2017
    April 2017
    March 2017
    February 2017
    January 2017
    December 2016
    November 2016
    October 2016
    September 2016
    August 2016
    July 2016
    June 2016
    May 2016
    April 2016
    March 2016
    February 2016
    January 2016
    December 2015
    November 2015
    October 2015
    September 2015
    July 2015
    June 2015
    May 2015
    April 2015
    March 2015
    February 2015
    January 2015
    December 2014
    November 2014
    October 2014
    September 2014
    August 2014

Powered by Create your own unique website with customizable templates.
  • Blog
  • About/Contact
  • Anji Books
  • Recipes
  • Gallery