Anji Cooper
  • Blog
  • About/Contact
  • Anji Books
  • Recipes
  • Gallery

Welcome to my blog! 

If I'm being entirely honest with you, I don't actually post too often on this blog, but you know if you want to follow me go for it. When I do post though, I often post recipes or random things like life updates or whatever. It's honestly just a hobby blog, anything that I'm currently into might get posted here. I also have another blog where I review things (movies, TV shows, books, mostly books) @ Anjibooks, so if you're looking for a good book or anything, definitely go check that out. 

Testing Buzzfeed's "Perfect" Chocolate Chip Cookie Recipe

8/4/2018

0 Comments

 
Picture
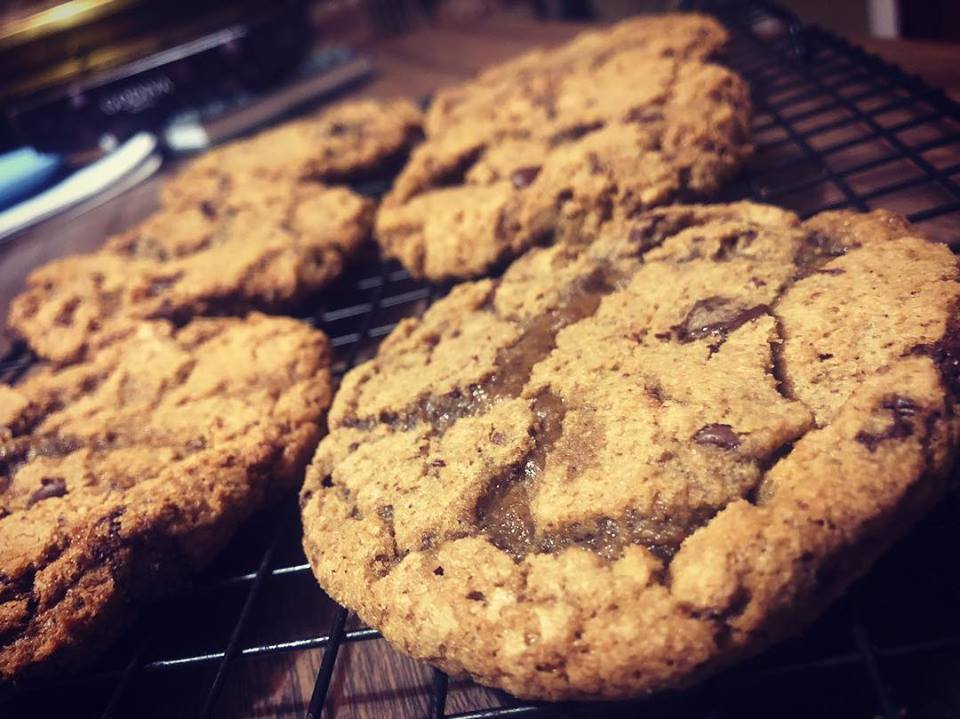
Chocolate chip cookies were a staple in most of our childhoods. I, for one, have many memories of helping to measure flour and sugar, and then being told NOT to eat the cookie dough (and then eating it anyway). Then again, as a child I was more than happy to be given anything sweet. Now a days I'm not the biggest consumer of cookies-- I find them boring to make and boring to eat. Nevertheless, when I came across Buzzfeed's "Perfect" Chocolate Chip Cookie recipe, I felt a relentless urge to try it out. Why? I'm not exactly sure, especially since Buzzfeed's "Perfect" Chocolate Cake recipe turned out to be such an epic failure. Still, I tried it, and here are my results. (In the video) 
The conclusion that I came to was that yes, these are in fact some spectacular cookies. They have a crunchy outside and a goey middle-- which, for most, is what would be defined as the "perfect" cookie. Would I say they're the best in the entire world? See, the difficult thing is that first off, they're not exactly my preferred type of cookie, and secondly I don't eat a lot of cookies therefore I can't exactly be the best judge of what the "best" is. My favorite kind of cookie is the really crunchy sort-- and while goey is good, I think crunchy is better. The recipe is certainly better than your average cookie, due to the extra ingredients in it such as browned butter and espresso powder-- they just add more layers of flavor that really make it a treat for your tongue. 
The recipe is definitely a lot more work than your average cookie recipe as well-- such as the browned butter. While the browned butter makes the flavor go beyond average, it also takes an age to make. And all the extra steps do add up to a lot of extra time (which can be assumed, I suppose, because adding anything extra would obviously add extra time). I would recommend trying making these if you're looking for something fancy-- maybe to impress people, or maybe just to try a really good cookie. If you just want a quick and easy cookie, this certainly isn't the recipe for you. 
I followed every step given, including the recommended but unnecessary step of leaving the cookies to sit in the fridge overnight. This is a way to develop more flavor in the dough-- actually, it's a trick that many bakeries use, and since I wanted these cookies to be the best they could, I left them to sit overnight. Which turned out to be harder than I expected-- the extra ingredients made this cookie dough even more deadly and tempting than other doughs. All I wanted to do was just gobble down the raw dough, needless to say I was pretty excited to try them after they were baked off the next morning. 
I also added half a teaspoon less salt than the recipe called for after reading a comment on the original video saying the normal amount was WAY too salty. Personally, I think this was a good choice because the cookies I tried seemed to have just the right balance of salt in them, but according to Caitlin, I should've added the extra salt and that would've made them just perfect for her. So, if you're a fan of salty cookies, go for the full two teaspoons. 

Also here's the link to Buzzfeed's video and recipe-- but just so you don't have to click on another link, here is the full recipe written out below as well. :)


Makes 18 cookies
INGREDIENTS
1 cup bread flour
¾ cup all-purpose flour
2 teaspoons kosher salt or 1½ teaspoon table salt
1 teaspoon baking soda
1 cup (2 sticks) unsalted butter
2-3 tablespoons cold water
1 cup dark brown sugar
½ cup white sugar
2 teaspoons vanilla extract
1 teaspoon espresso powder
1 large egg
1 large egg yolk
½ cup semisweet chocolate chips
5 ounces dark chocolate, chopped
PREPARATION
Preheat the oven to 350˚F (180˚C). (Unless you want to let the cookies sit overnight in the fridge)
In a medium bowl, sift together the flours, salt, and baking soda. Set aside. 
In a medium light-bottomed saucepan, add the butter and melt over medium heat. 
Bring the butter to a boil, stirring occasionally. As the water begins to boil out of the butter, the milk solids in the butter will separate, sink to the bottom, and begin to toast and brown. As this begins to happen, make sure to stir constantly so the butter browns evenly. It may become quite foamy and difficult to see, so keep a close eye on it.
Once the butter has turned a nice nutty brown, remove from the heat and pour into a liquid measuring cup to stop the cooking. Give it a stir and add 2-3 tablespoons of cold water to the butter to bring it back up to 1 cup of liquid. Set aside to cool to room temperature. To help speed this process up, you can place in the fridge for 10-15 minutes. You want to make sure the butter is still liquid when you’re adding it to the dough later on, so make sure to remove after 15 minutes.
In a large bowl, add the sugars, vanilla, espresso powder, and cooled brown butter. Cream together with an electric hand mixer until light and fluffy, 1-2 minutes. (If not becoming fluffy, the butter may be too warm. Stick in the fridge for a bit to let it cool off and then try again.) 
Add the egg and yolk and beat until incorporated.
Add the dry ingredients, about ⅓ of the mixture at a time, and beat between additions until just incorporated. It’s okay for there to be a bit of unmixed flour on the edge of bowl, this will be incorporated in the next step. 
Using a wooden spoon, fold the chocolate chips and chunks into the dough
Scoop the cookies onto a parchment paper-lined baking sheet in 3-tablespoon-sized mounds. 
For optimal flavor, cover and refrigerate for 1 hour or, even better, overnight. 
Evenly space the dough 3 inches apart from one another on a parchment paper-lined baking sheet. Bake in a preheated oven for 12-14 minutes. 
Let the cookies cool on the baking sheet for 2-3 minutes before transferring to a cooling rack to cool completely.
Enjoy!

Thanks for reading, 
​Anj


0 Comments


Leave a Reply.

    Picture

    Author

    I'm very passionate about reading, writing, baking, cooking, crafting and art. I also enjoy photography, being with friends, procrastinating, and doing pointless things on internet.  

      Subscribe For Updates :)

    Subscribe

    RSS Feed

    Categories

    All
    Accidents/Embarrassing Moments
    Arts/Crafts
    College
    Cooking And Baking
    DIY
    Family
    Friends
    Healthy Food
    High School
    Life Update
    Me
    Quotes
    Recipes
    Special Occasion
    Travel
    YouTube

    twitter

    Archives

    December 2020
    September 2019
    April 2019
    March 2019
    February 2019
    December 2018
    October 2018
    September 2018
    August 2018
    June 2018
    May 2018
    April 2018
    March 2018
    February 2018
    January 2018
    December 2017
    November 2017
    October 2017
    September 2017
    August 2017
    July 2017
    June 2017
    May 2017
    April 2017
    March 2017
    February 2017
    January 2017
    December 2016
    November 2016
    October 2016
    September 2016
    August 2016
    July 2016
    June 2016
    May 2016
    April 2016
    March 2016
    February 2016
    January 2016
    December 2015
    November 2015
    October 2015
    September 2015
    July 2015
    June 2015
    May 2015
    April 2015
    March 2015
    February 2015
    January 2015
    December 2014
    November 2014
    October 2014
    September 2014
    August 2014

Powered by Create your own unique website with customizable templates.
  • Blog
  • About/Contact
  • Anji Books
  • Recipes
  • Gallery